eng
English
ger
Sören Thie
English
Login
Login
forgot password
Login
New here? Register now
0,00 €
There are no items in your basket
Katalog 2025
Kunststoffe
Technische Silikone
Dubliersilikone
Knetsilikon
Gips
3D Druck
Abdampftechnik
Absaugtechnik
Aligner & Tiefziehtechnik
Arbeitsschutz & Desinfektion
Brenngutträger
Bürsten
Druckluftzubehör
Geräte
Handschuhe
Instrumente
Isolieren
Kronentrenner
Liquids & Sprays
Metalle
Modellherstellung
Pinsel
Polierer
Polituren
Reiniger
Ronden
Software
Sprays & Zubehör
Strahlmittel
Teleskopbearbeitung - Jörg Schönthal
Trennscheiben
Verpackungen
Wachs
Werkzeuge CAM & Handstück
Werkzeuge Diamanten
Dental-Technician
impression
Safty equipment
silicones
acrylics
wax
precious metals
sprays & specials
modell making
partial frameworks
finishing
polish
compressed air
lab equipment
Dental-Equipment
Abformung Praxis
gloves
one way equipment
desinfection
IPD
NT Implantatteile
NT Implantatteile
L-Serie - Straumann Bone Level
CAM-Serie - CAMLOG
R-Serie - Zimmer Dental
N-Serie - Straumann Synocta
F-Serie - Nobel Biocare Active
SEV-Serie - Astra Tech EV
H-Serie - Biomet 3i Certain
BIO-Serie - BioHorizons
E-Serie - Nobel Biocare Replace
S-Serie - Astra Tehc OsseoSpeed
COL-Serie - CONELOG
T-Serie - Xive
NEO-Serie - NEOSS
BEG-Serie - BEGO
MEX-Serie - ICX Medentis
BRE-Serie - Bredent
MIS-Serie - MIS Seven
MIC-Serie - MIS C1
HIO-Serie - Hiossen
THO-Serie - Thommen
K-Serie - Nobel Biocare Branemark
I-Serie - Biomet 3i Osseotite
MEG-Serie - Megagen AnyRidge
Y-Serie - Ankylos
Tools
Tungsten carbid cutters
Sintered burs
Diamond discs
Crown cutters
Surgury diamand burs
CAM Tools
Separting stripes
Milling technique
CAD/CAM
Contact
telephone
contact formular
Katalog 2025
Show all
Kunststoffe
Technische Silikone
Dubliersilikone
Knetsilikon
Gips
3D Druck
Abdampftechnik
Absaugtechnik
Aligner & Tiefziehtechnik
Arbeitsschutz & Desinfektion
Brenngutträger
Bürsten
Druckluftzubehör
Geräte
Handschuhe
Instrumente
Isolieren
Kronentrenner
Liquids & Sprays
Metalle
Products dental technology
Show all
Abformung Labor
Industrial safty
Gips
Gipsabscheider
Druckluft (Teile und Zubehör)
Model-making
Duplicating
Pinsysteme
Sockelformer
Split-Cast-System
Gips
Model casting
Blasting agent
Non-precious metal
Polish
Investments
Wax
Plastic
Two-component plastic
Radiopaque plastic
Light-curing resin
Plastic for temporary
Clean & Strip
Polishers
Universal silicon polishers
Silicon polishers for acrylic
Diamonds polishers for zirconia
Diamonds polishers
Poliersets
Rotating instruments
Practical equipment
Show all
Industrial safty and goolgs
Becher
Practical equipment
gloves
Vinyl
Latex
Nitril
Mundschutz
Brillen
Kopfbedeckung
Zahnbürsten
Traypapier
Servietten
Rotierende Instrumente
Show all
Hartmetallfräser
Zirkonbearbeitung
Sinterdiamanten
Diamantscheiben
Kronentrenner
Diamantschleifer
CAM Werkzeuge
MC Dental smart mill unit T/W
Amann Girrbach
VHF
Sirona
Zirkonzahn
Separierstreifen
Frästechnik
NT Implantatteile
Show all
L-Serie - Straumann Bone Level
CAM-Serie - CAMLOG
R-Serie - Zimmer Dental
N-Serie - Straumann Synocta
F-Serie - Nobel Biocare Active
SEV-Serie - Astra Tech EV
H-Serie - Biomet 3i Certain
BIO-Serie - BioHorizons
E-Serie - Nobel Biocare Replace
S-Serie - Astra Tehc OsseoSpeed
COL-Serie - CONELOG
T-Serie - Xive
NEO-Serie - NEOSS
BEG-Serie - BEGO
MEX-Serie - ICX Medentis
BRE-Serie - Bredent
MIS-Serie - MIS Seven
MIC-Serie - MIS C1
HIO-Serie - Hiossen
THO-Serie - Thommen
K-Serie - Nobel Biocare Branemark
I-Serie - Biomet 3i Osseotite
MEG-Serie - Megagen AnyRidge
Y-Serie - Ankylos
IPD
IPD
Start
Items with
Multi-unit® Abutment - Page 3 of 5
Filter by
150 Items
Sorting
Standard
Name A-Z
Name Z-A
Price ascending
Price descending
Availability
Weight
Item number
Date of issue
latest first
EAN
Bestseller
Ratings
Items per page
12 Items per page
24 Items per page
48 Items per page
96 Items per page
Gallery
List
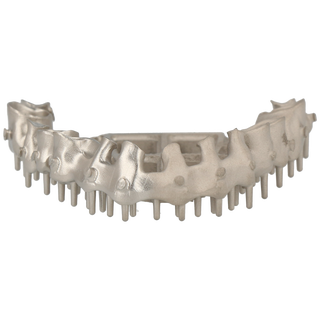
IPD-Implantatsystem
8
Active / Replace CC®
3
AnyOne®
3
AnyRidge®
3
Axiom® BL
3
BLX®
8
Bone Level®
6
Brånemark®
4
C1/V3®
2
Camlog®
9
Certain®
4
Conelog®
6
Evolution®
3
Eztetic®
3
Gran Morse®
6
Helix® HE
3
ICX®
3
Implantium®/Superline®
3
In-Kone®
5
Internal Hex
3
Kontact
8
Osseospeed?
7
Replace Select®
9
Screw Vent®
11
Semados
1
Tissue Level®
10
TSIII
6
UFII
10
Vega
IPD-Implantatgröße
4
Active / Replace CC® 3.5
4
Active / Replace CC® 4.3
3
AnyOne® RP
3
AnyRidge® 4.0
3
Axiom® BL RP
3
BLX® RB/WB
4
Bone Level® 3.3 NC
4
Bone Level® 4.1 RC
1
Brånemark® 3.5
5
Brånemark® 4.1
4
C1/V3® Standard 3.5
1
Camlog® 3.8
1
Camlog® 4.3
4
Certain® 3.4
5
Certain® 4.1
2
Conelog® 3.8
2
Conelog® 4.3
3
Evolution® 3.6
3
Evolution® 4.2
3
Eztetic® 3.1
3
GM
3
Gran Morse® GM
3
Helix® HE 3.3
3
Helix® HE 5.0
3
ICX® RP
3
Implantium®/Superline® RP
3
In-Kone® RP
5
Internal Hex 4.1
3
Kontact RP
4
Osseospeed? 3.5/4 Aqua
4
Osseospeed? 4.5/5 Lilac
2
Replace Select® 3.5
5
Replace Select® 4.3
5
Screw Vent® 3.5
4
Screw Vent® 4.5
5
Semados 3.25/3.75
4
Semados 4.1
2
Semados 4.5
4
Standard 3.5
1
Tissue Level® 4.8
5
TSIII 3.5
5
TSIII 4.0
3
UFII NP
3
UFII RP
5
Vega 3.5
5
Vega 4.0/4.5
IPD-Implantatfirma
3
Anthogyr®
14
Astra®
11
Bego
9
Biomet 3i®
3
Biotech®
5
BTI®
6
Camlog®
3
Dentium®
6
DIO®
3
Global D®
10
Klockner®
3
Medentis®
6
Megagen®
4
MiS®
9
Neodent®
21
Nobel Biocare®
10
Osstem
12
Straumann®
12
Zimmer®
IPD-Produkt
150
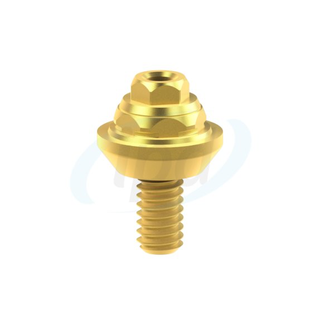
Multi-unit® Abutment
AKTIONSWARE
GESAMTER KATALOG
Show all
ACRYLX
ACURATA
AMPRI
BDT
ERKODENT
HARNISCH & RIETH
HORICO
IPD
JORDAN DAMPFSTRAHLER
MEGADENTAL
NT Implantatteile
Show all
BEG-Serie - BEGO
BIO-Serie - BioHorizons
BRE-Serie - Bredent
CAM-Serie - CAMLOG
COL-Serie - CONELOG
E-Serie - Nobel Biocare Replace
F-Serie - Nobel Biocare Active
H-Serie - Biomet 3i Certain
HIO-Serie - Hiossen
I-Serie - Biomet 3i Osseotite
K-Serie - Nobel Biocare Branemark
L-Serie - Straumann Bone Level
MEG-Serie - Megagen AnyRidge
MEX-Serie - ICX Medentis
MIC-Serie - MIS C1
MIS-Serie - MIS Seven
N-Serie - Straumann Synocta
NEO-Serie - NEOSS
R-Serie - Zimmer Dental
S-Serie - Astra Tehc OsseoSpeed
SEV-Serie - Astra Tech EV
T-Serie - Xive
THO-Serie - Thommen
Y-Serie - Ankylos
POLIRAPID
ZUBLER
STRATASYS
Instrumente
Show all
Gipsinstrumente
Keramikinstrumente
Klemmen und Pinzetten
Messgeräte
Modellierinstrumente
Scheren
Skalpell
Spatel
Wachsmesser
Zangen
Rotierende Instrumente
Show all
Hartmetallfräser
Zirkonbearbeitung
Sinterdiamanten
Diamantscheiben
Kronentrenner
Diamantschleifer
CAM Werkzeuge
Show all
MC Dental smart mill unit T/W
Separierstreifen
Frästechnik
silicones
Show all
Dubliersilikon
Show all
10:1 Hochleistungs-Silikon
1:1 Silikon
Knetsilikon
Technische Laborsilikone
Products dental technology
Show all
Abformung Labor
Industrial safty
Druckluft (Teile und Zubehör)
Gips
Gipsabscheider
Model-making
Show all
Duplicating
Gips
Pinsysteme
Sockelformer
Split-Cast-System
Model casting
Show all
Non-precious metal
Polish
Blasting agent
Investments
Wax
Plastic
Show all
Two-component plastic
Light-curing resin
Radiopaque plastic
Plastic for temporary
Löffelmaterial
Clean & Strip
Zubehör
Polishers
Show all
Diamonds polishers
Poliersets
Silicon polishers for acrylic
Universal silicon polishers
Diamonds polishers for zirconia
mandrels
Rotating instruments
Pinsel
Sprays & Accessories
Show all
Sprays
Verpackungen und Koffer
Tiefziehfolien
BEGO
Laborgeräte
Seperating slides
Products consumables
Show all
Gloves
Mouthguard
Towels
Zubler
Practical equipment
Show all
Aligner Zubehör
Brillen
Desinfection
Show all
Disinfection of impressions
Surface desinfection
Hautdesinfektion
Hand disinfection
Instruments disinfection
Sterilisation
Gips
gloves
Show all
Nitril
Mundschutz
Sterilisation
Practical equipment
CAD/CAM
Show all
Zirkon fräsen
NE-Metall fräsen
PMMA fräsen
Wachs fräsen
Schienen
Titanabutments
3D-Druck
PEEK fräsen
Zubehör Artikel
Material
Show all
Werkzeug
Zirkon
Scanbodys
Laborschrauben
Software
Handschuhe
Show all
Nitril
Chemikalienschutz
Fertigungsauftrag erstellen
Show all
3D Druck
Fräsen
Show all
NEM
Schienen
Fertigung nach Material
Katalog 2025
Show all
3D Druck
Abdampftechnik
Absaugtechnik
Aligner & Tiefziehtechnik
Arbeitsschutz & Desinfektion
Brenngutträger
Bürsten
Druckluftzubehör
Dubliersilikone
Geräte
Gips
Handschuhe
Instrumente
Isolieren
Knetsilikon
Kronentrenner
Kunststoffe
Liquids & Sprays
Metalle
Modellherstellung
Pinsel
Polierer
Polituren
Reiniger
Ronden
Software
Sprays & Zubehör
Strahlmittel
Technische Silikone
Teleskopbearbeitung - Jörg Schönthal
Trennscheiben
Verpackungen
Wachs
Werkzeuge CAM & Handstück
Werkzeuge Diamanten
Preview
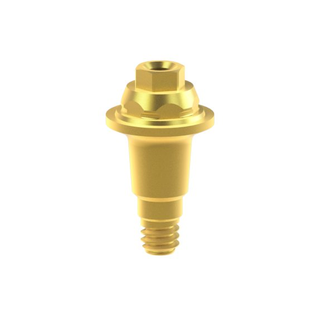
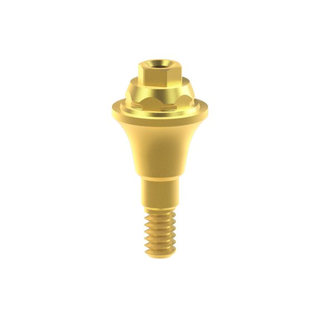
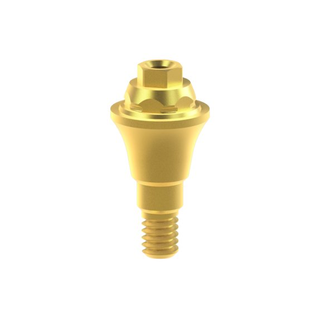
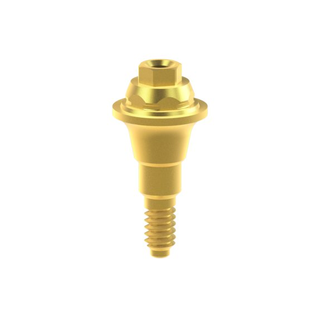
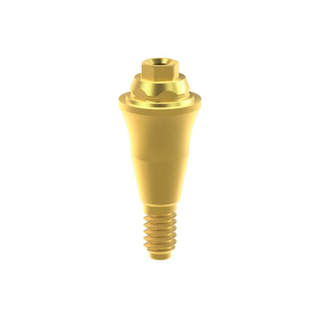
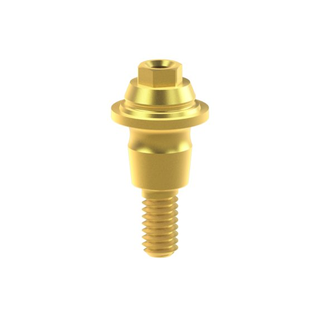
Multi-unit® Abutment Global D® für In-Kone® RP Gingivahöhe 1,5 mm
47,00 €
*
Short supply
Shipping time: 3 - 5 workdays
Basket
Add to basket
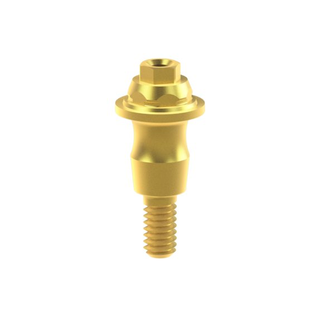
Preview
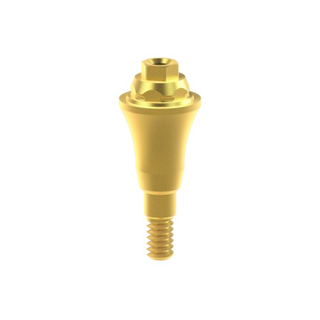
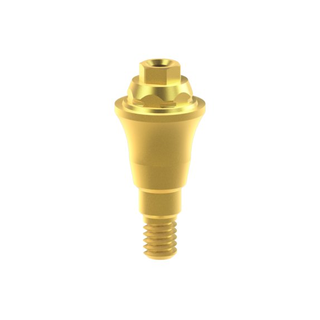
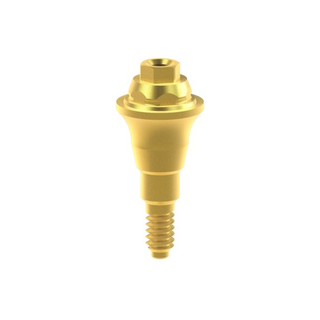
Multi-unit® Abutment Global D® für In-Kone® RP Gingivahöhe 2,5 mm
47,00 €
*
Short supply
Shipping time: 3 - 5 workdays
Basket
Add to basket
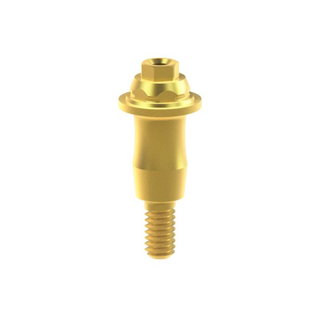
Preview
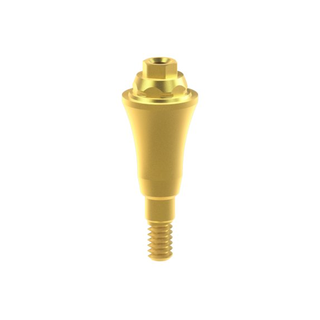
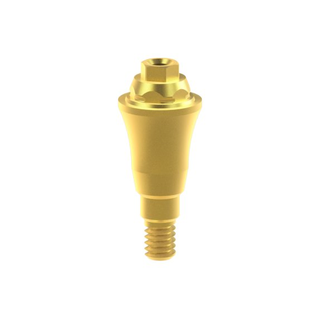
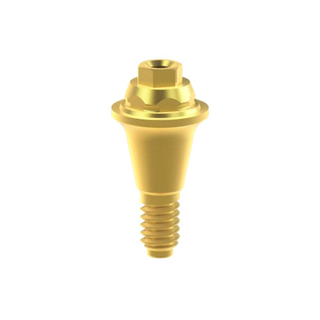
Multi-unit® Abutment Global D® für In-Kone® RP Gingivahöhe 3,5 mm
47,00 €
*
Short supply
Shipping time: 3 - 5 workdays
Basket
Add to basket
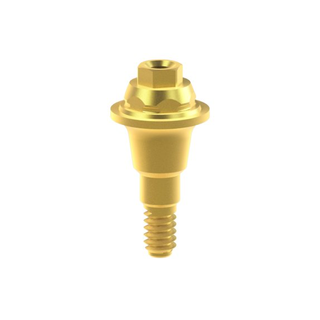
Preview
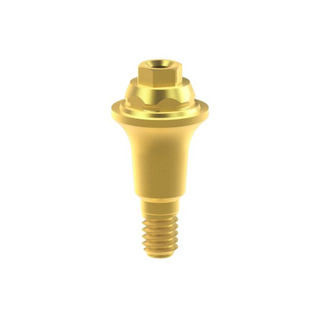
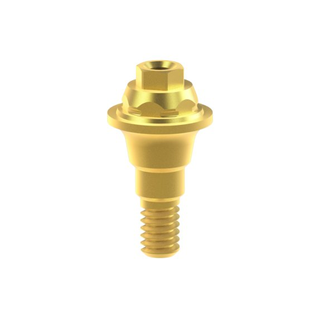
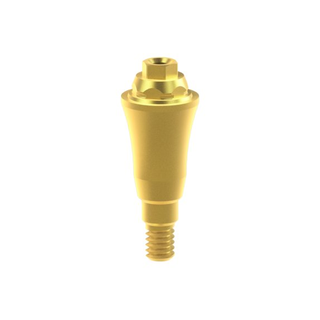
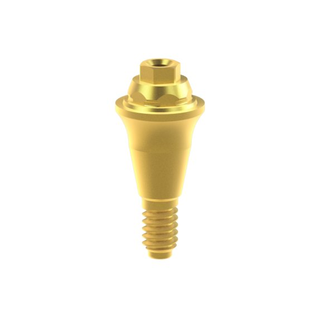
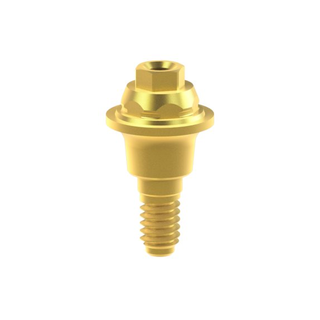
Multi-unit® Abutment Klockner® für Vega 3.5 Gingivahöhe 1,5 mm
47,00 €
*
Short supply
Shipping time: 3 - 5 workdays
Basket
Add to basket
Preview
Multi-unit® Abutment Klockner® für Vega 3.5 Gingivahöhe 2,5 mm
47,00 €
*
Short supply
Shipping time: 3 - 5 workdays
Basket
Add to basket
Preview
Multi-unit® Abutment Klockner® für Vega 3.5 Gingivahöhe 3,5 mm
47,00 €
*
Short supply
Shipping time: 3 - 5 workdays
Basket
Add to basket
Preview
Multi-unit® Abutment Klockner® für Vega 3.5 Gingivahöhe 4,5 mm
47,00 €
*
Short supply
Shipping time: 3 - 5 workdays
Basket
Add to basket
Preview
Multi-unit® Abutment Klockner® für Vega 3.5 Gingivahöhe 5,5 mm
47,00 €
*
Short supply
Shipping time: 3 - 5 workdays
Basket
Add to basket
Preview
Multi-unit® Abutment Klockner® für Vega 4.0/4.5 Gingivahöhe 1,5 mm
47,00 €
*
Short supply
Shipping time: 3 - 5 workdays
Basket
Add to basket
Preview
Multi-unit® Abutment Klockner® für Vega 4.0/4.5 Gingivahöhe 2,5 mm
47,00 €
*
Short supply
Shipping time: 3 - 5 workdays
Basket
Add to basket
Preview
Multi-unit® Abutment Klockner® für Vega 4.0/4.5 Gingivahöhe 3,5 mm
47,00 €
*
Short supply
Shipping time: 3 - 5 workdays
Basket
Add to basket
Preview
Multi-unit® Abutment Klockner® für Vega 4.0/4.5 Gingivahöhe 4,5 mm
47,00 €
*
Short supply
Shipping time: 3 - 5 workdays
Basket
Add to basket
Preview
Multi-unit® Abutment Klockner® für Vega 4.0/4.5 Gingivahöhe 5,5 mm
47,00 €
*
Short supply
Shipping time: 3 - 5 workdays
Basket
Add to basket
Preview
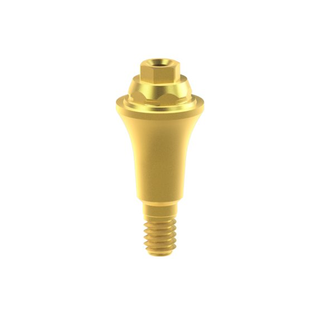
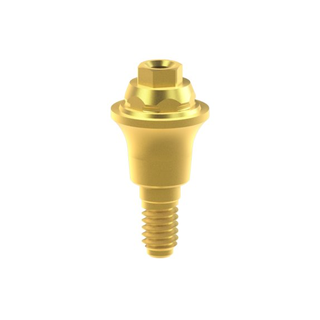
Multi-unit® Abutment Medentis® für ICX® RP Gingivahöhe 1,5 mm
47,00 €
*
Short supply
Shipping time: 3 - 5 workdays
Basket
Add to basket
Preview
Multi-unit® Abutment Medentis® für ICX® RP Gingivahöhe 2,5 mm
47,00 €
*
Short supply
Shipping time: 3 - 5 workdays
Basket
Add to basket
Preview
Multi-unit® Abutment Medentis® für ICX® RP Gingivahöhe 3,5 mm
47,00 €
*
Short supply
Shipping time: 3 - 5 workdays
Basket
Add to basket
Preview
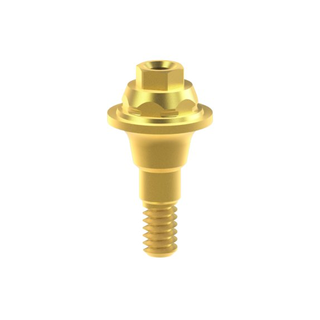
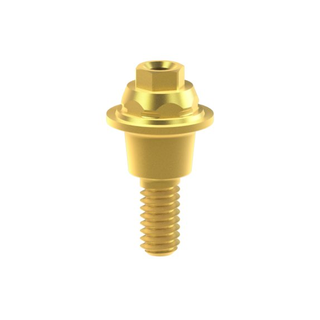
Multi-unit® Abutment Megagen® für AnyOne® RP Gingivahöhe 1,5 mm
47,00 €
*
Short supply
Shipping time: 3 - 5 workdays
Basket
Add to basket
Preview
Multi-unit® Abutment Megagen® für AnyOne® RP Gingivahöhe 2,5 mm
47,00 €
*
Short supply
Shipping time: 3 - 5 workdays
Basket
Add to basket
Preview
Multi-unit® Abutment Megagen® für AnyOne® RP Gingivahöhe 3,5 mm
47,00 €
*
Short supply
Shipping time: 3 - 5 workdays
Basket
Add to basket
Preview
Multi-unit® Abutment Megagen® für AnyRidge® 4.0 Gingivahöhe 1,5 mm
47,00 €
*
Short supply
Shipping time: 3 - 5 workdays
Basket
Add to basket
Preview
Multi-unit® Abutment Megagen® für AnyRidge® 4.0 Gingivahöhe 2,5 mm
47,00 €
*
Short supply
Shipping time: 3 - 5 workdays
Basket
Add to basket
Preview
Multi-unit® Abutment Megagen® für AnyRidge® 4.0 Gingivahöhe 3,5 mm
47,00 €
*
Short supply
Shipping time: 3 - 5 workdays
Basket
Add to basket
Preview
Multi-unit® Abutment MIS® für C1/V3® Standard 3.5 Gingivahöhe 1,0 mm
47,00 €
*
Short supply
Shipping time: 3 - 5 workdays
Basket
Add to basket
Preview
Multi-unit® Abutment MIS® für C1/V3® Standard 3.5 Gingivahöhe 2,0 mm
47,00 €
*
Short supply
Shipping time: 3 - 5 workdays
Basket
Add to basket
Preview
Multi-unit® Abutment MIS® für C1/V3® Standard 3.5 Gingivahöhe 3,0 mm
47,00 €
*
Short supply
Shipping time: 3 - 5 workdays
Basket
Add to basket
Preview
Multi-unit® Abutment MIS® für C1/V3® Standard 3.5 Gingivahöhe 4,0 mm
47,00 €
*
Short supply
Shipping time: 3 - 5 workdays
Basket
Add to basket
Preview
Multi-unit® Abutment Neodent® für Gran Morse® GM Gingivahöhe 1,5 mm
47,00 €
*
Short supply
Shipping time: 3 - 5 workdays
Basket
Add to basket
Preview
Multi-unit® Abutment Neodent® für Gran Morse® GM Gingivahöhe 2,5 mm
47,00 €
*
Short supply
Shipping time: 3 - 5 workdays
Basket
Add to basket
Preview
Multi-unit® Abutment Neodent® für Gran Morse® GM Gingivahöhe 3,5 mm
47,00 €
*
Short supply
Shipping time: 3 - 5 workdays
Basket
Add to basket
Preview
Multi-unit® Abutment Neodent® für Helix® HE 3.3 Gingivahöhe 1,5 mm
47,00 €
*
Short supply
Shipping time: 3 - 5 workdays
Basket
Add to basket
Page
3
of 5
1
2
3
4
5
interesting stuff for you
Dental-Studio Thie
3D Printing (FDM) STL-File
starting from
0,40 €
*
0,40 € per 1 cm
3
Details
Dental-Studio Thie
Alloy milling STL-File
starting from
24,00 €
*
Details
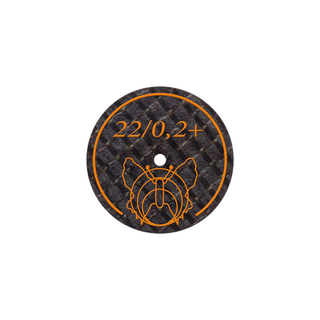
MOTYL s.c.
Trennscheibe 22/0,2+BF
1,12 €
*
Details
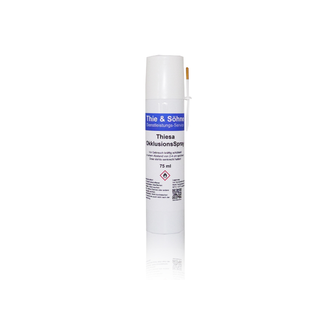
Thie & Söhne DLS
Thiesa OkklusionsSpray
6,50 €
*
Details
Gamundia
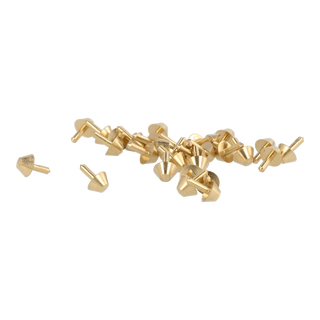
Gamundia-Zentrierkegel 100 Stk. Splitcastsockel
16,90 €
*
0,17 € per Stk.
Details
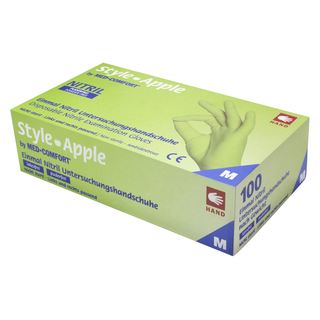
AMPri
3 Grün Nitril- Untersuchungshandschuhe
11,90 €
*
Details
Taglus
Aligner Taglus BIG Tiefziehfolien 280x200 mm
28,90 €
*
Details
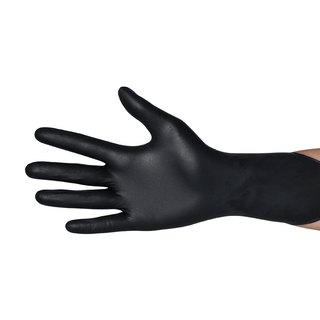
AMPri
Style Black Nitril-Handschuhe schwarz
starting from
4,60 €
*
Details
MOTYL s.c.
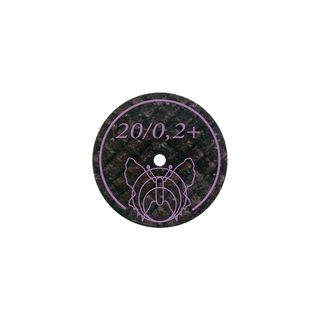
Diamant - Trennscheibe 20/0,2+BF
1,99 €
*
Old price:
2,66 €
Details
Dental-Studio Thie
Aufbissschiene Splint Schiene STL-Datensatz fräsen
59,00 €
*
Details